
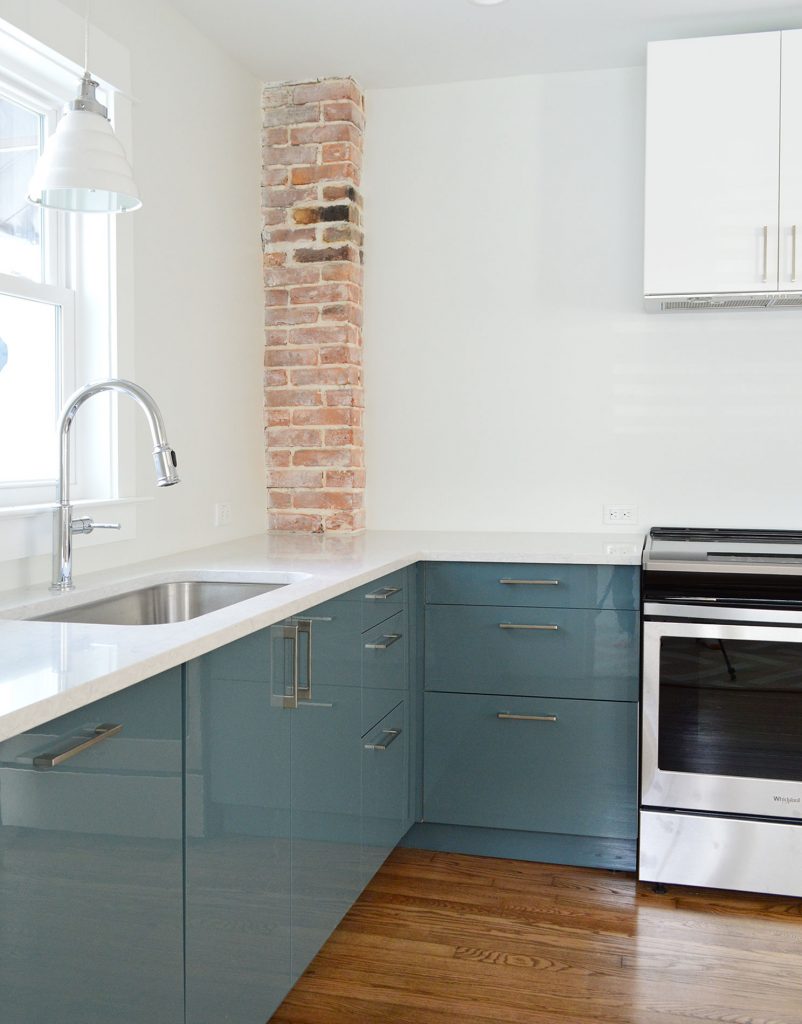
The duplex kitchens are looking more and more like real kitchens, and they took an especially big leap forward this past weekend after we got all of the cabinet hardware installed. But drilling holes into new cabinets can be scary and there’s not a whole lot of room for error or do-overs. So unless you’re a fan of buying a whole new door or drawer front, it’s important that you get everything centered and level on the first try. No pressure, right?
Thankfully, after installing three kitchens-worth of pulls and knobs in the last year and a half, we’ve perfected our system. So here’s how you can keep things straight, centered, consistent throughout the entire kitchen, and bring down the fear-factor when drilling into your brand new (or freshly refinished/repainted) cabinets.
We even included a short video that’ll take you through each step (and show you a sneak peek at the wood kitchen side of the duplex), so let’s get started.
Installation Tools & Supplies
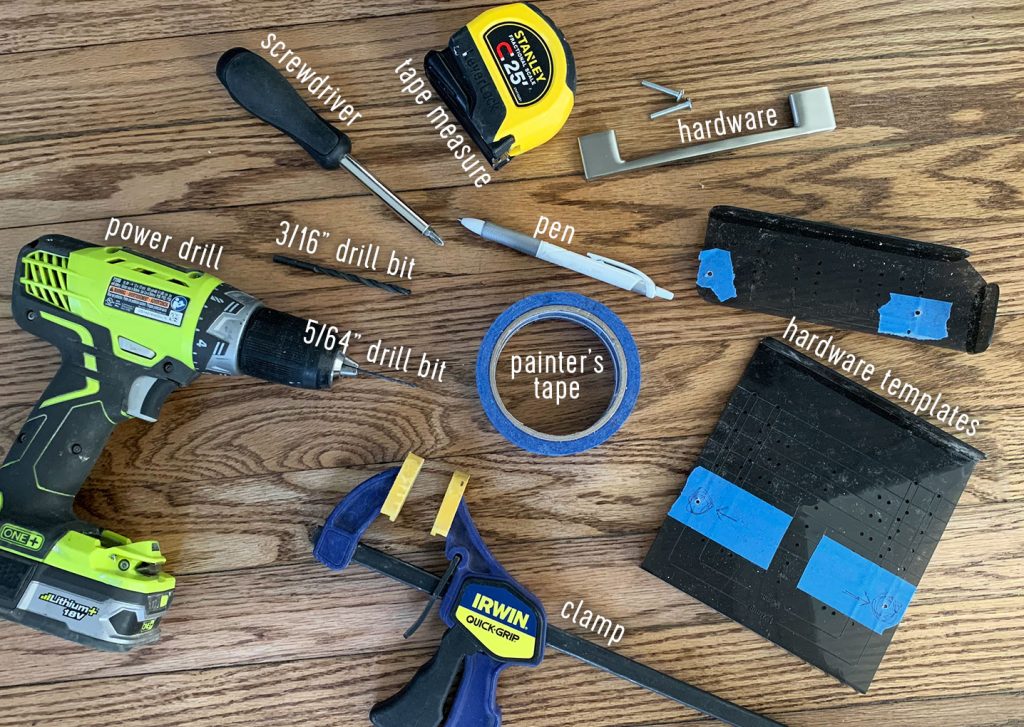
Here are the tools and supplies you’ll want to have on hand to help your installation go smoothly:
- Your pulls or knobs (we did these in nickel on the side with the blue Kallarp doors, and the same ones in brass on the wood Askerlund doors). * Buying hardware in bulk like this can keep costs way down
- This two-pack of hardware templates
- Tape measure
- Screwdriver (with Philips head or whatever head matches the screws that came with your cabinet hardware)
- Power drill
- 3/16″ drill bit (one’s included with our fav hardware templates)
- 5/64″ drill bit (or smaller – ours is from this drill bit set)
- Pen or pencil
- Painter’s tape
- Clamp
Video: Installing Your Cabinet Pulls
We made a start-to-finish video while installing one set of drawers so you can see the process in real time. We’ve also shown each step in photos below if you’d prefer to see the steps that way, but the video will give you a really complete view of what’s involved (and show you a sneak peek of the wood kitchen side of the duplex). Plus you can play Where’s Waldo and try to spot Sherry’s slippers somewhere in this video.
NOTE: If you’re viewing this in a feed reader you may need to click through to the original blog post see the video. You can also watch it here on YouTube.
Step 1: Mark Your Hardware Templates
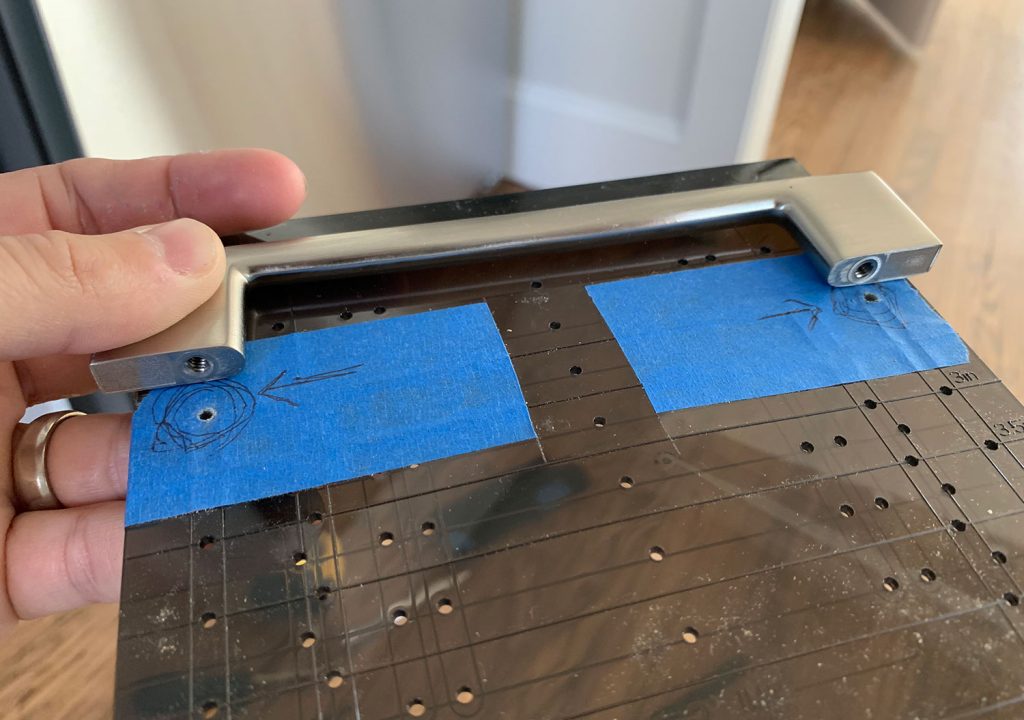
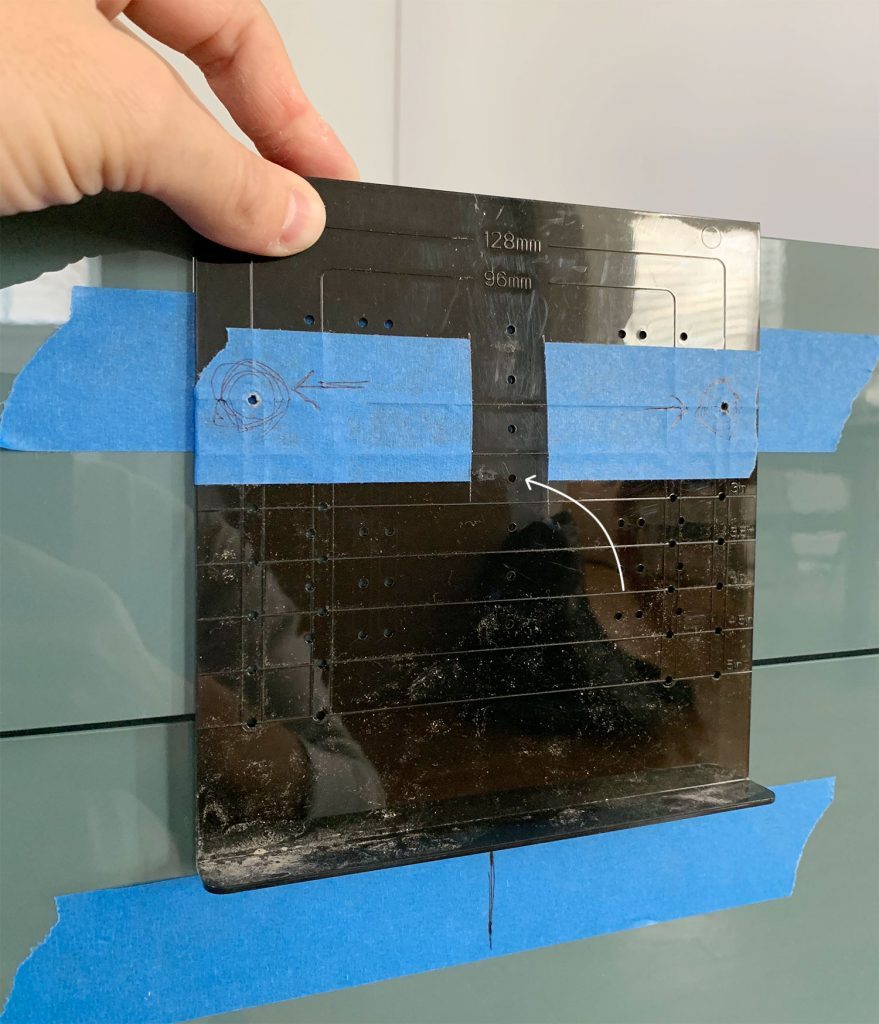
The hardware templates are the real heroes of this project, so if you’re hesitating to spend the $10 on them – THEY ARE COMPLETELY WORTH IT. They’ll save you so much time and stress. They have holes for all of the standard handle spreads (ours were 4″) and lots of options for how far down from the cabinet top you may want them placed (we did a 2″ drop). If you’re doing knobs, you’ll just use the holes down the center at whatever drop you choose, which is also nice and handy to keep things consistent.
Once we’ve determined which holes will give us our desired handle placement, we use tape and a pen to mark them right on the template with a circle and a big arrow. There are a lot of holes in close proximity on these templates, and you don’t want to accidentally drill through the wrong one at any point, so whatever you have to do to idiot-proof the process is worth the few seconds it takes. This is what ours looks like after we’ve marked our chosen holes at the right spread (again, your pulls determine this – ours were 4″ pulls) and drop (remember we chose a 2″ drop for all of ours throughout the kitchen).
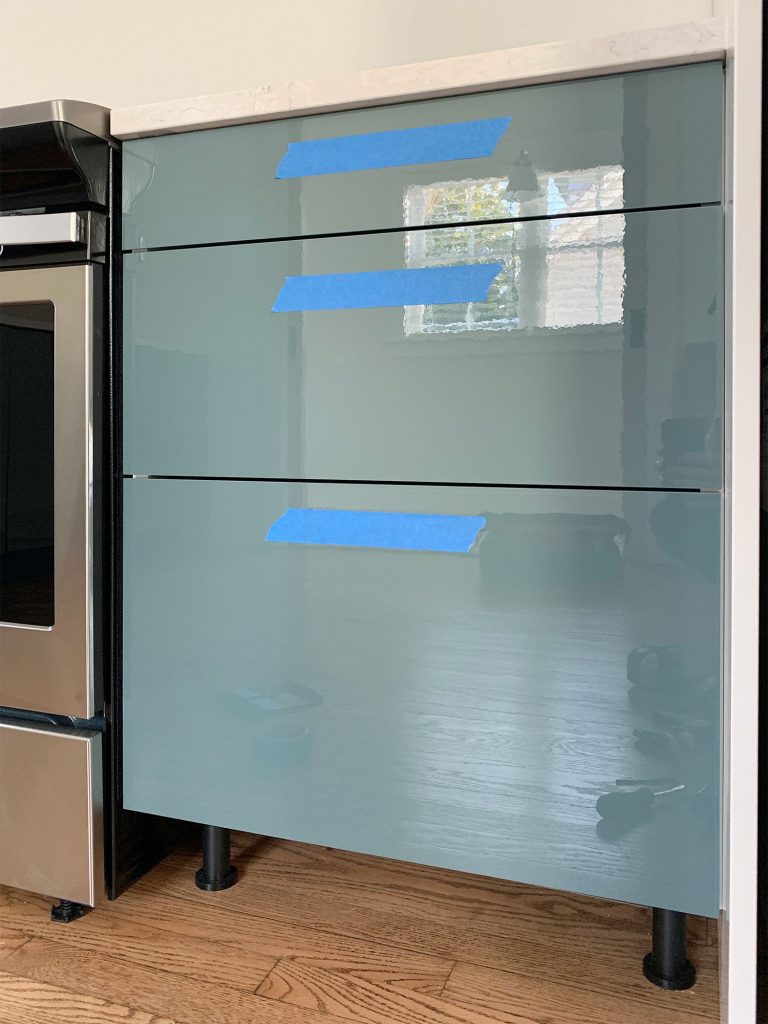
Step 2: Tape Off Your Cabinet Fronts
Before drilling, place painter’s tape roughly where you’re going to hang your hardware. This not only gives you a surface you can mark up without actually marking on your cabinets, it will also help prevent your cabinet finish from cracking or splitting as your drill into it. For efficiency, we like to tape off all of the drawers in one cabinet at the same time and work our way around the kitchen that way – just taking it one area at a time.
Step 3: Mark A Center Line On Each Front
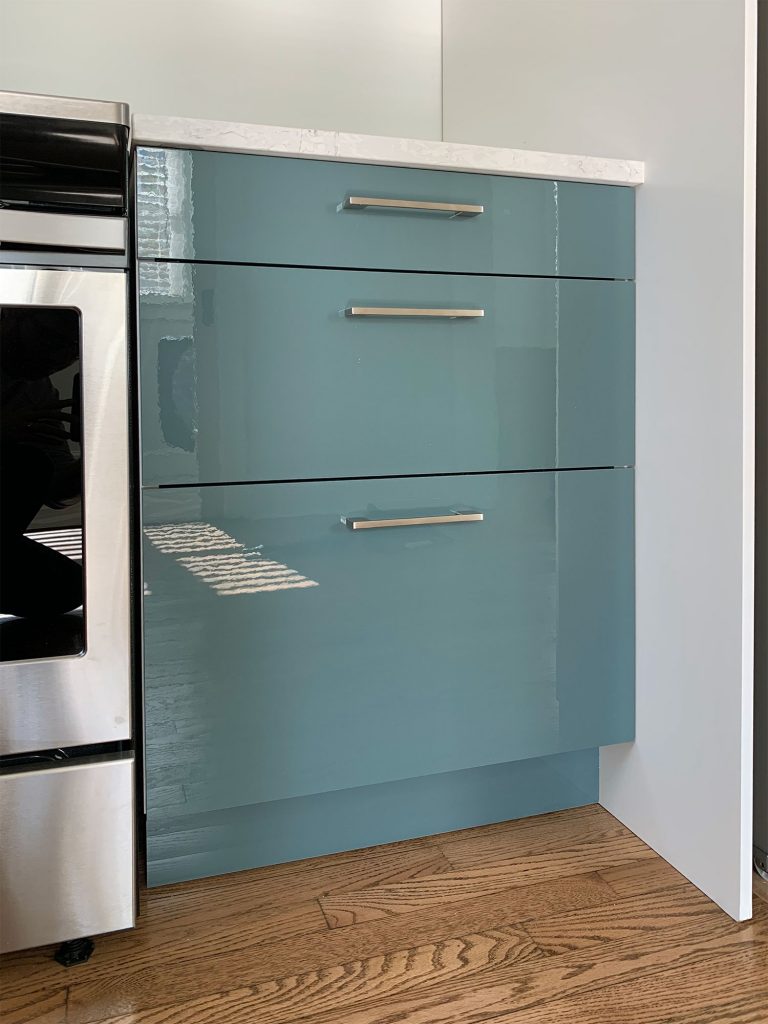
This step is important, especially on stacks of drawers like this because you’ll really notice if one handle is even slightly off-center or not level with the others. So we like to take our time and really triple check ourselves.
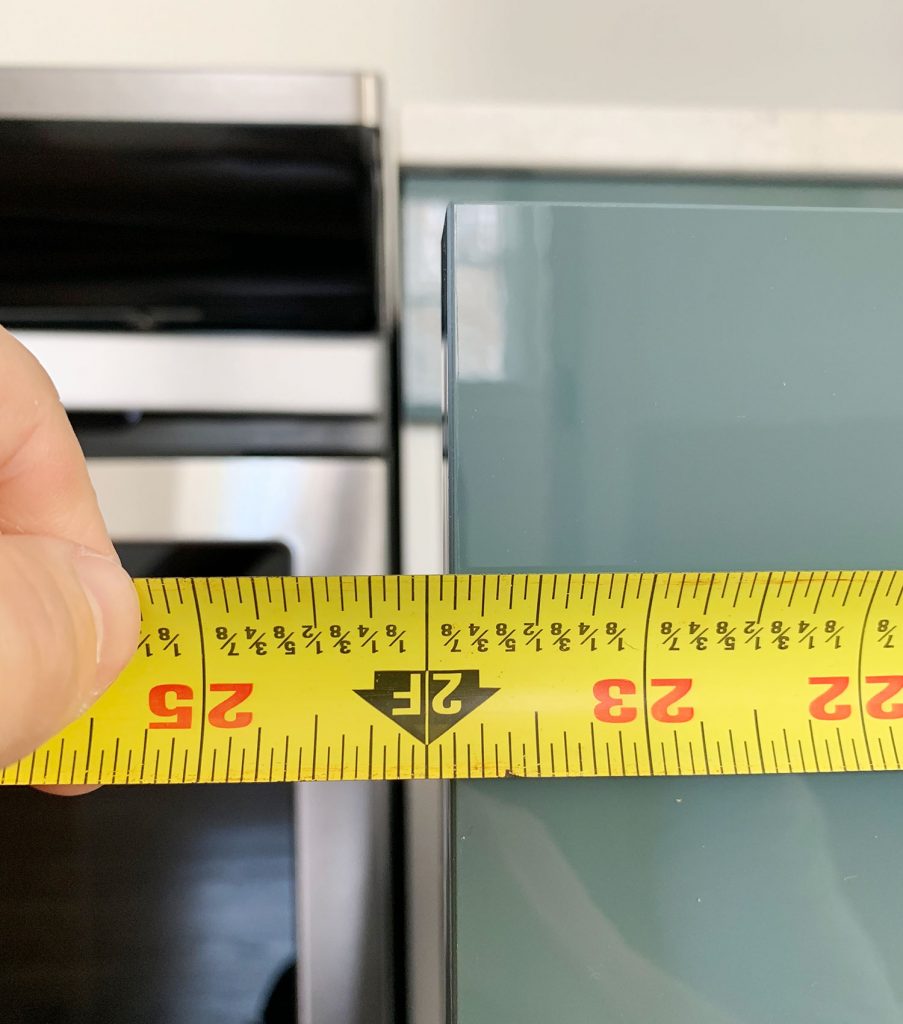
First, measure the full width of your door. Even though ours is a 24″ base cabinet, the drawer fronts themselves are slightly smaller (23 7/8″).
Then do whatever math you need to do to figure out half of your drawer front measurement (ours is 11 15/16″ – or just one tiny tick mark inside the 12″ line). Once you’re certain of your center measurement, mark it on your blue tape – then double-check yourself by measuring again from the OTHER side of the drawer to make sure it’s the same on both sides.
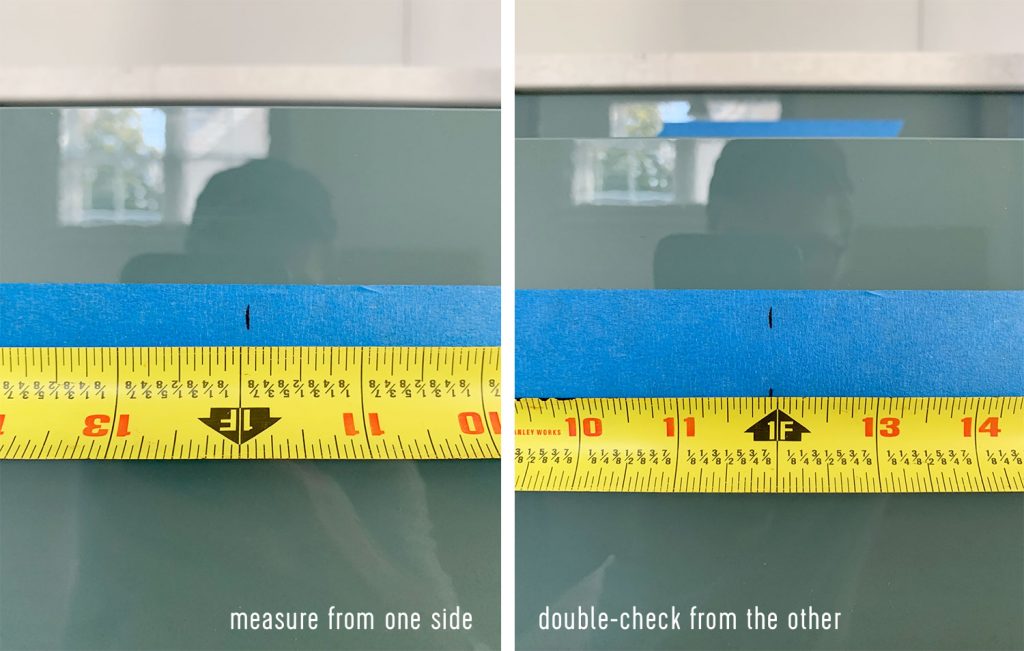
I know that last step may seem like overkill, but we caught our own mistakes a couple of times during this installation (once you’re on your 20th drawer, 12 15/16″ starts to look a lot like 11 15/16″). So double-checking from the other side saved us more than once from some badly placed holes.
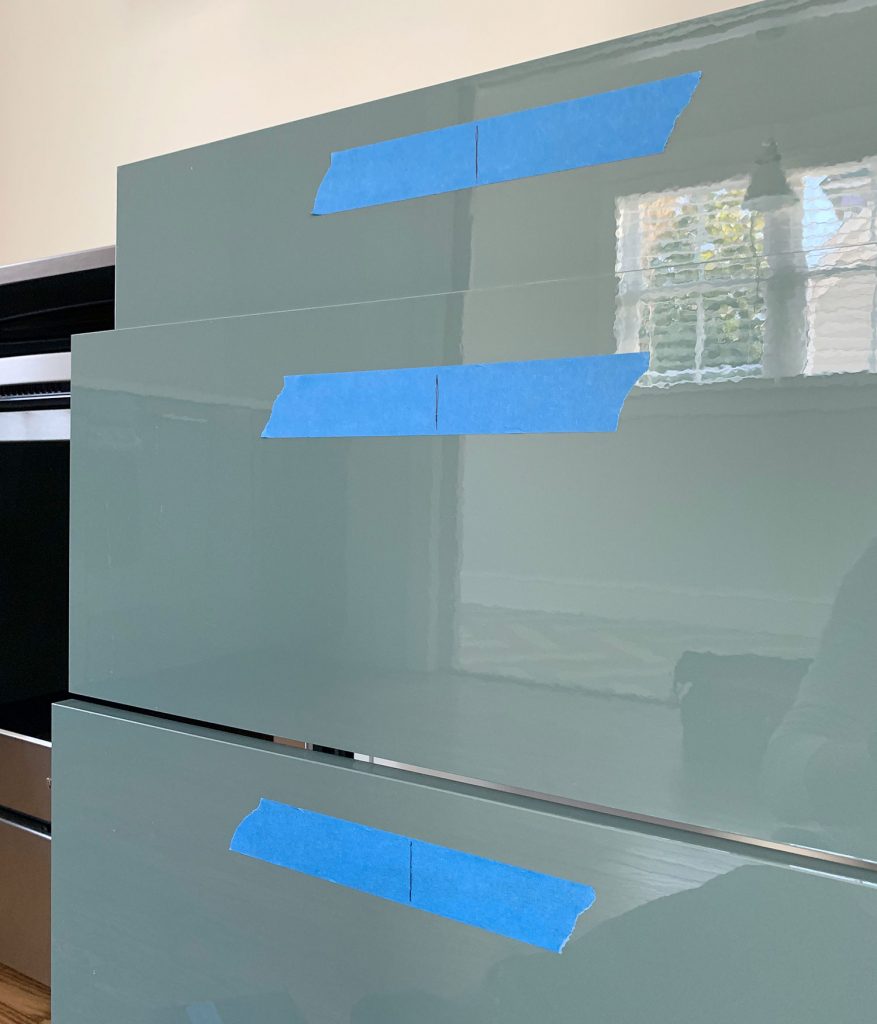
Once you’ve marked the center on each drawer (you may even want to do a quick visual confirmation that they seem to line up with one another) draw your marks a little bigger so they’ll be easier to see in the next step, and step back to make sure they all look lined up.
Step 4: Line Up Your Hardware Template
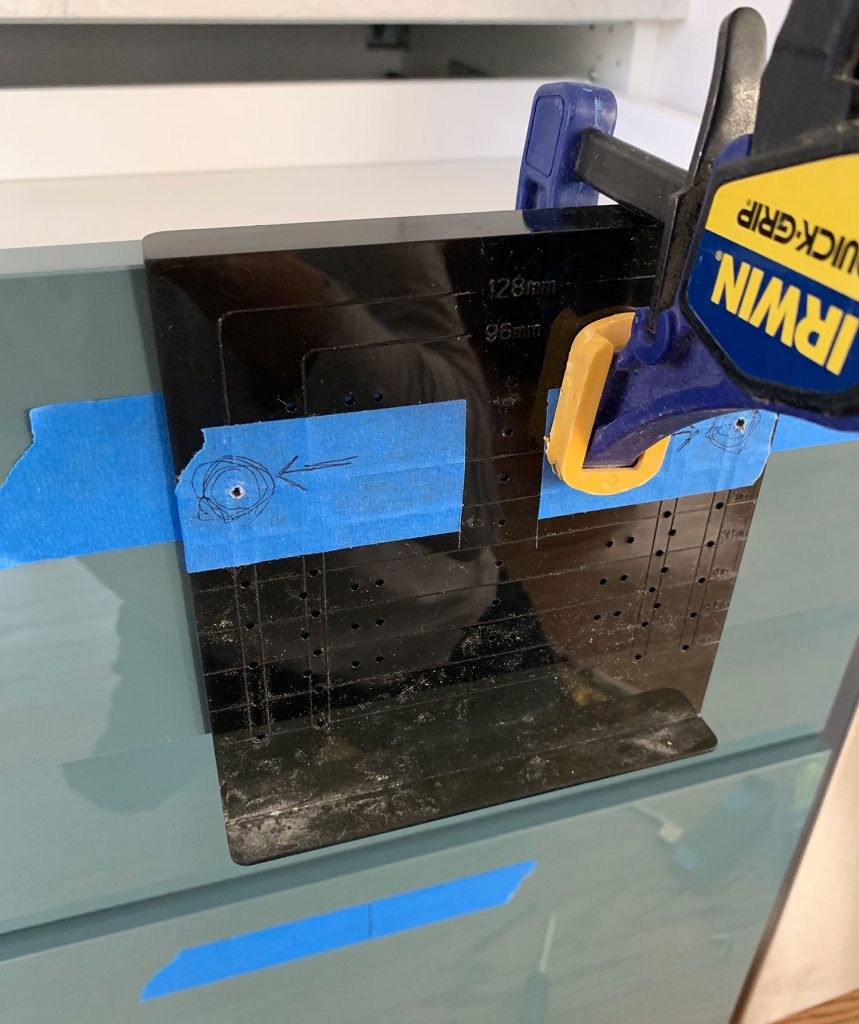
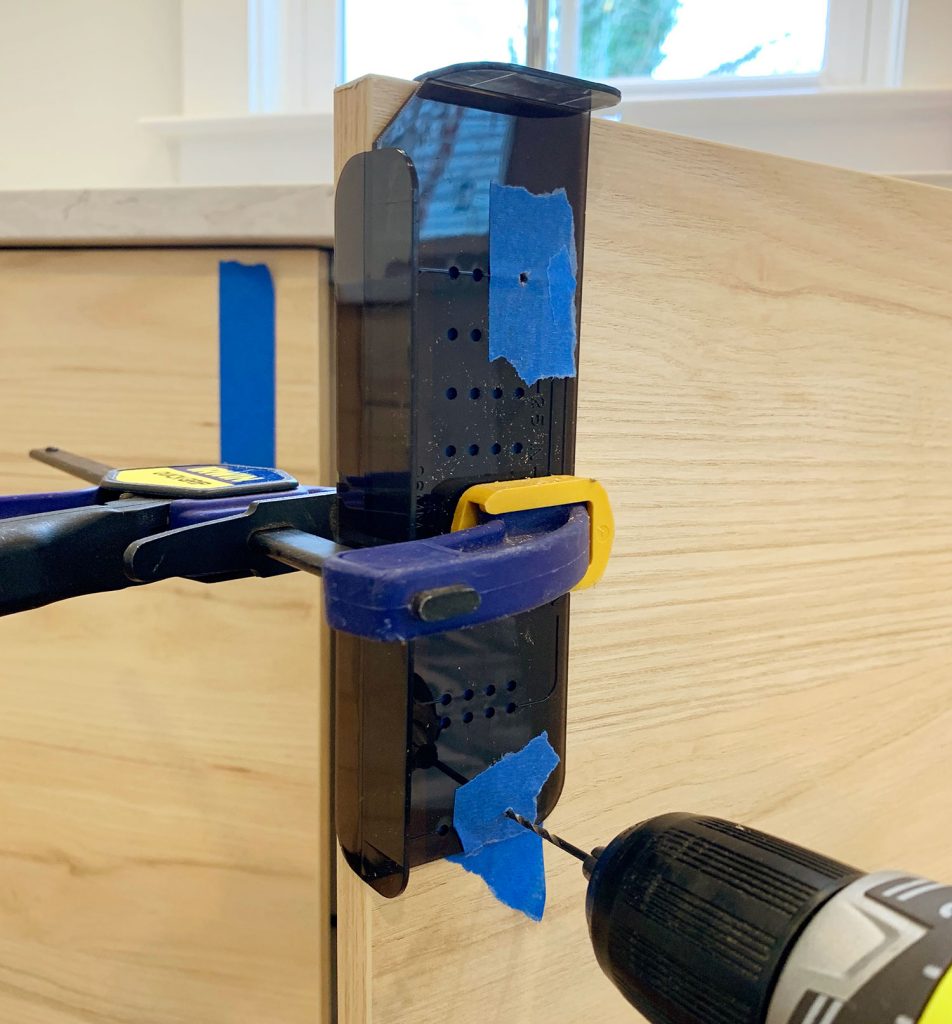
On your first drawer, rest the hardware template’s lip on the top of your drawer and then center it over the lines you just marked. This was a little easier with our old template (which was clear) but with enough squinting through those center holes on the template, we could see our premarked line on the blue tape behind it.
Once you’re sure you’ve got the template centered on your marked line AND evenly resting on the top of the drawer, we like to clamp ours in place so it doesn’t move during the next step.
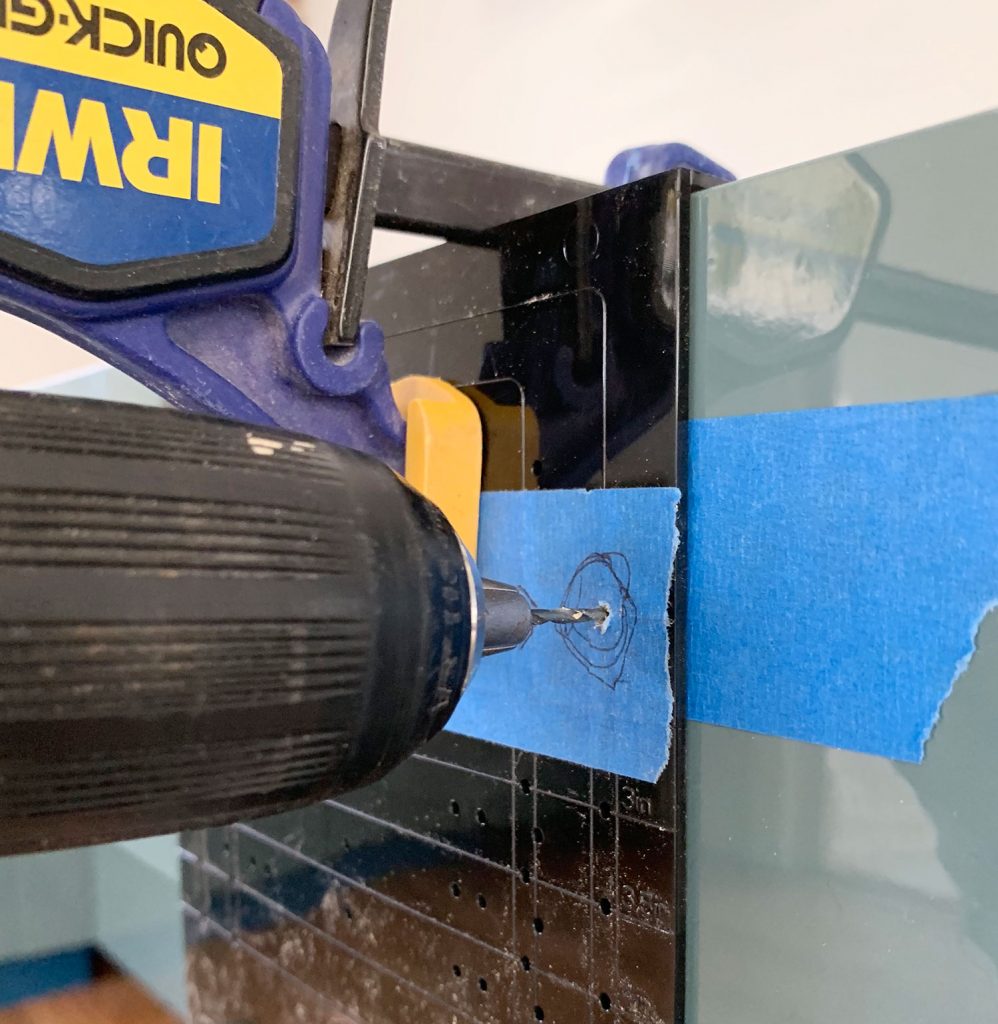
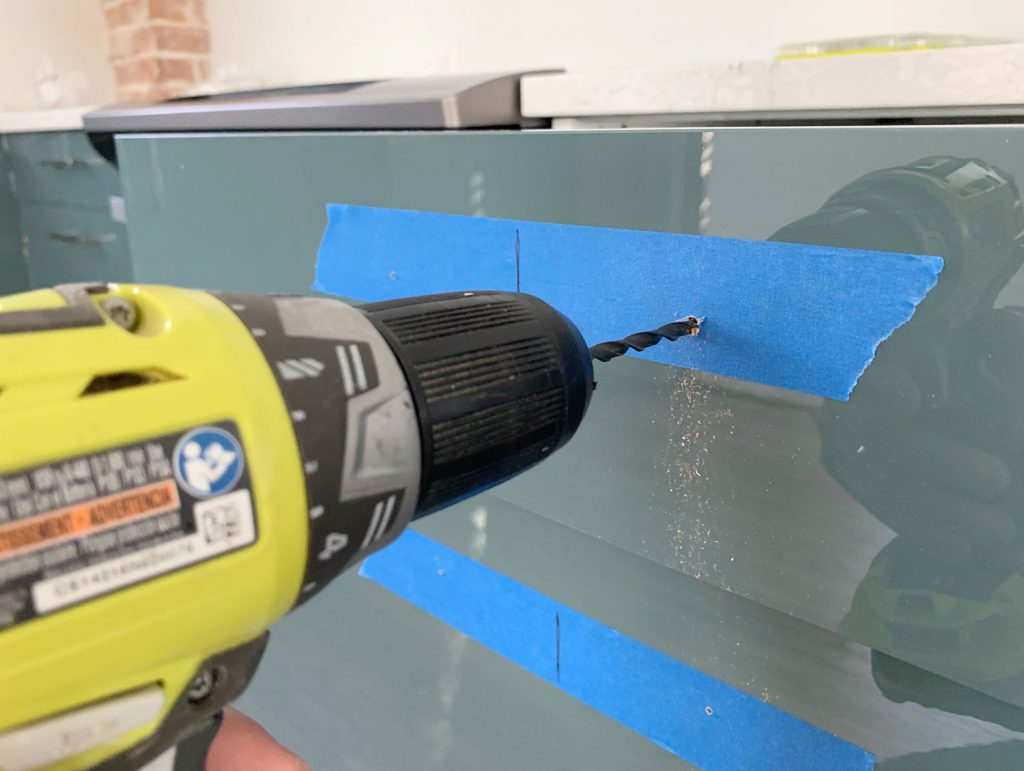
Step 5: Drill Pilot Holes Through Your Hardware Template
Some people prefer to just mark their handle holes through their template with a pen (remember these are the holes in the template that you taped off with the arrow pointing at them), but we find that we’re able to get a much more precise hole if we drill directly through the hole in the template. You’ll need a pretty small drill bit to do this (ours was 5/64″) but you’d want to drill a small pilot hole to start each hole anyway (before moving onto the larger bit) so it’s nice to just do it through the template.
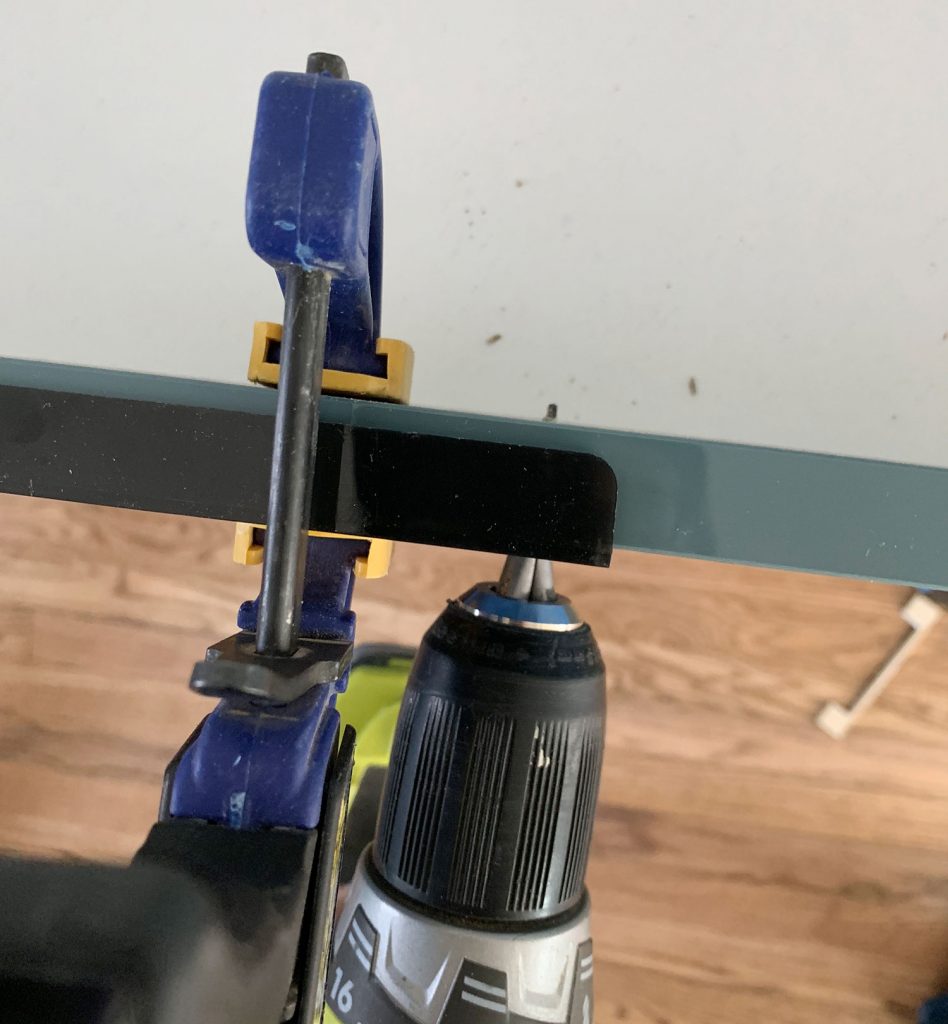
Assuming your cabinet hardware is like ours that screws on through the back of the drawer, you’ll want to make sure your pilot hole goes all the way through the drawer and pokes out the back. I show in the video how we tend to drill slowly as we go through the back to minimize any potential cracking on the backside of the drawer. You can also put more painter’s tape on the back of the drawer where your drill bit will poke through if you’re especially concerned about splintering on the back, but in most cases it will be covered by the screw head anyway.
Once the first drawer is done, we like to repeat Steps 4 and 5 (center your template, drill pilot holes) on the rest of the drawers in whatever cabinet we’re working on so that we don’t have to switch our our drill bit back and forth for each drawer. Bulking stuff this way makes you faster and gets you into a nice rhythm.

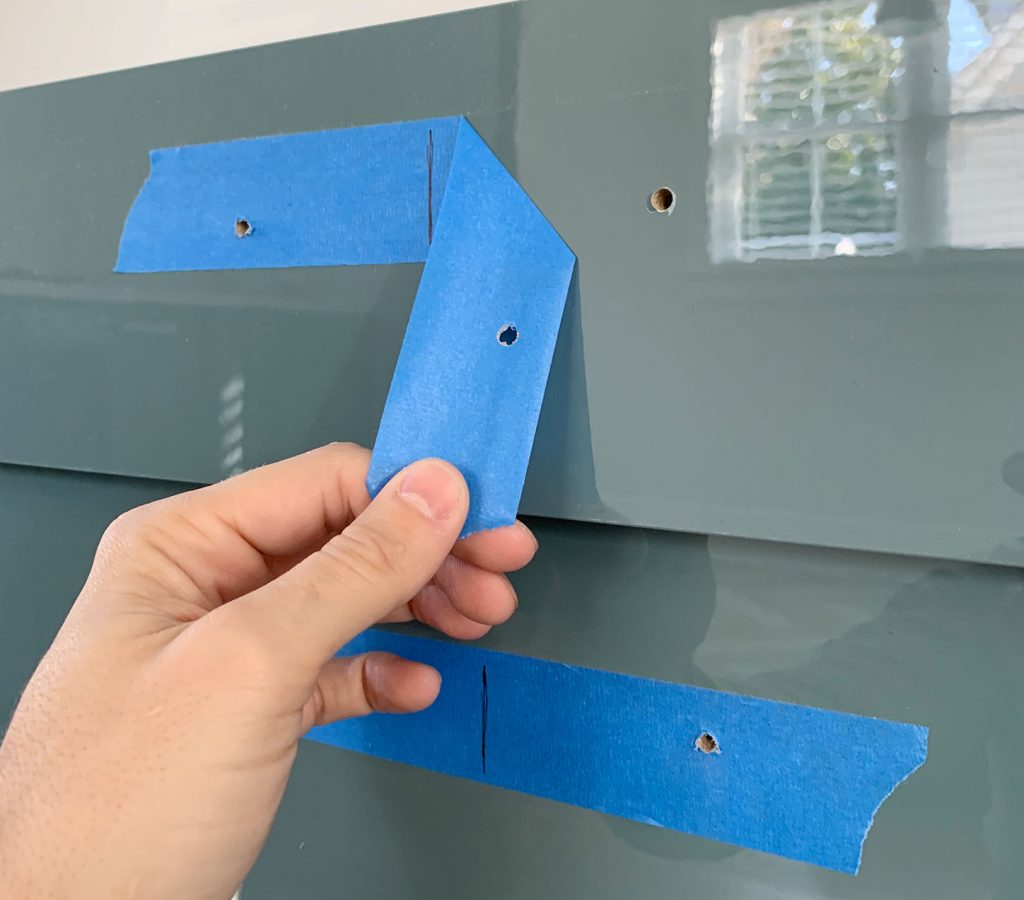
Step 6: Drill Your Final Holes
Once you’ve made all of your pilot holes, remove your hardware template (but not your tape!) and switch out your drill bit for a 3/16″ bit. The hardware template actually comes with one because it’s the standard size for most hardware screws. But it doesn’t hurt to make sure it creates a large enough hole for your screws. Then, carefully drill through your pilot holes with the larger bit – again being sure to go through the back of the door, but without too much force.
Once all of the larger holes are drilled, you can finally remove your tape.
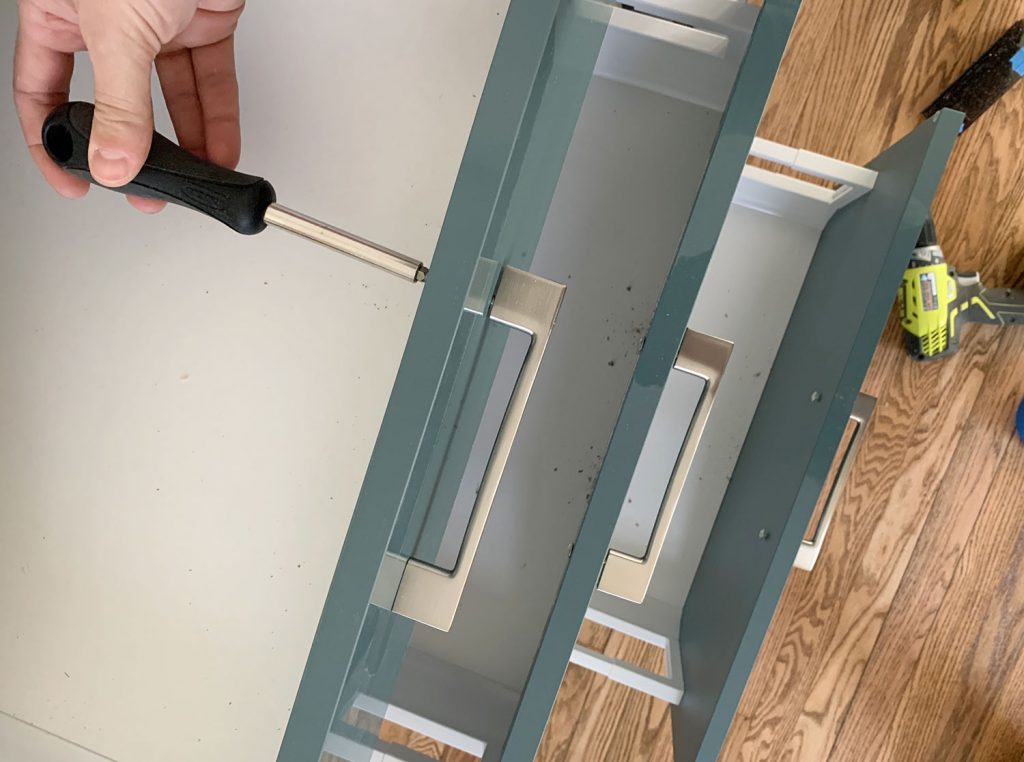
Step 7: Attach Your Cabinet Hardware
Now you can screw your hardware onto each door or drawer front. Your screws will go through from the inside of the drawer, and I like to connect both ends before tightening each screw with my hands first.
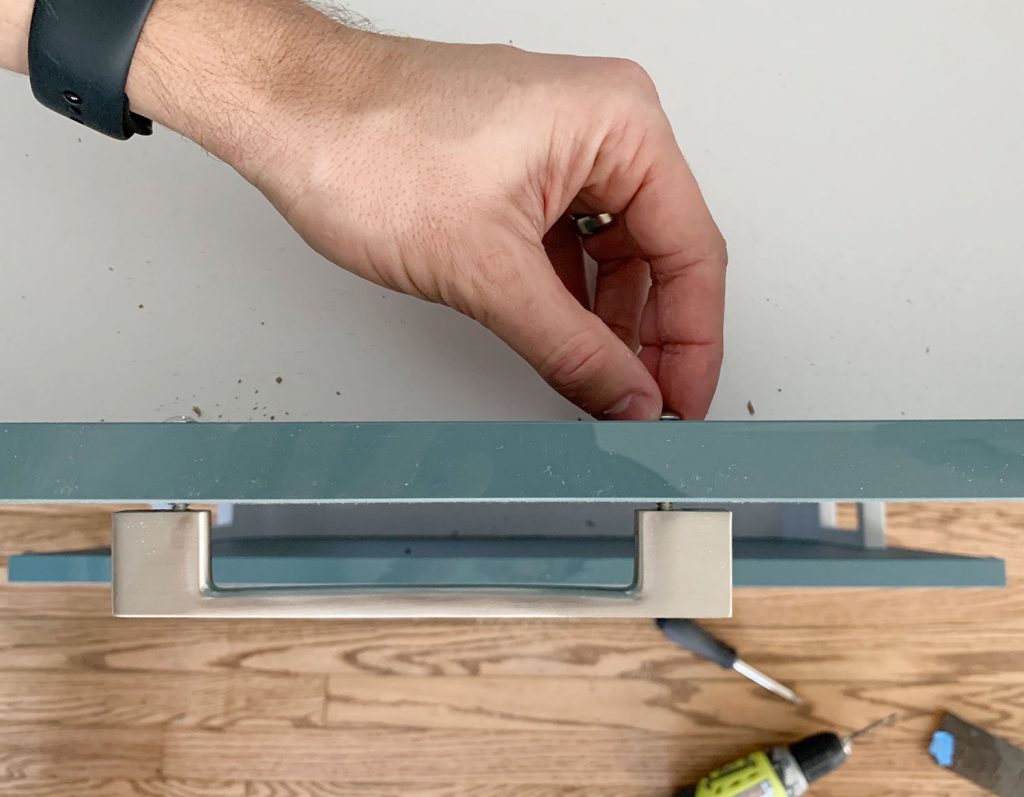
Once all of my pulls are loosely attached, I go back with a regular screwdriver and tighten everything so it’s held firmly to the door. I suggest NOT using your power drill here because screwing too tightly could cause damage to the door or drawer.
Step 8: Clean Up & You’re Done!
The last thing you’ll want to do is break out your vacuum hose to suck up all of the drill shavings in the drawers, cabinets, and on the floor. But other than that, you’re all done. Well, or you move on and repeat these steps for the rest of your cabinets.
And I should note that the process works pretty much the same if you’re installing knobs or pulls on a door like the cabinet fronts under the sink. You just use the OTHER template included in the set. It’s designed to rest along the corner of your cabinet door like the one you see below:
So I hope that helps take some of the fear and guesswork out of installing your own cabinet hardware. We’ll never not wince a little when making holes in cabinet doors, but following these steps helped us knock out both duplex kitchens in less than two hours – without a single crooked or off-center handle!
And for everyone who wants to see the entire kitchen and hear a bunch of tips for installing Ikea cabinets, stay tuned for a post coming up where we talk more about the process as a whole. Since we’ve gotten lots of practice installing Ikea kitchens, we have some tricks we wanna pass along. In the meantime, here’s a previous post on installing Ikea cabinets that will give you some info.
Want more kitchen how-tos? Check out these posts below:
- How To Paint Kitchen Cabinets
- Make Your Own Cabinet Hardware Template
- Installing Under Cabinet Lighting
- How to Hang A Subway Tile Backsplash for $200
*This post contains affiliate links*
The post How To Install Cabinet Hardware (With A Video!) appeared first on Young House Love.
from Home Improvements Articles and News https://www.younghouselove.com/install-kitchen-cabinet-hardware/
